Saturday, March 29, 2008

"Vision" necklace in hand dyed thread "Knitty Gritty"

These colors seem better suited to autumn, but anyhow, the thread works well with the beads. I only did a small batch of "Knitty Gritty" a couple weeks ago as an experiment. I think I will need to do some more!
I had a lot of fun varying the neck cord in this one, adding some split rings between the zigzag tatting. The large beads involved unwinding the shuttles, stringing the bead onto both threads, then rewinding the shuttles. A bit of extra work, but I'm pleased with the results!
The basic pattern for the "Vision" necklace is available here.

Thursday, March 27, 2008

Progress on bag #4


I did manage to get in a bit of weaving time. The circular area is done in bright green cotton, and the background in a tweedy wool yarn. I'll probably put some more squares on the back, do the front rather plain to show off the button, and then the weaving will be done. Then it'll be ready to sew.

Ok, one pattern ready to test

Looking for a volunteer to test tat my "Vision" earrings pattern. This is the one that I was working on here, but I have managed to improve it by eliminating the join on the back half of a split ring - hurray!

This design is intended for size 20 or 30 crochet cotton, and involves split rings, size 10 or size 11 seed beads, one round 4 mm bead, and Victorian sets (zigzag tatting). The pattern is a Word document, and I have written directions plus a diagram. This design's a bit tricky, but small.

Monday, March 24, 2008

Blue Green Pastel


"Blue Green Pastel" is the new dye batch, and it seems very spring-like.
Since I was feeling energetic, I included a few slow color change skeins in this batch, which have color lengths varying from about 14 to 44 inches (35 cm to 111 cm). The usual skeins have a variance from
about 3 to 8 inches between color changes.

Thursday, March 20, 2008

Flowery cross

One more repeat at the bottom would make the proportion better. But this seems like a good design to me, and the flowery edge is an effective way to use a variegated thread, I think. The thread I used is size 20, white on shuttle 2 and my own hand dyed "Lola" on shuttle 1. The finished size measures about 3x4 inches (almost 8x10 cm) The written pattern is still in the works...I have quite a few in the "works".
Bag #4 has been started on the loom. I used a little of the "Spicy Hot" hand dyed pearl cotton in the border of the bright rusty orange oval motif on the right. As with the previous bags, a polymer clay button and tatted loop is planned for a closure.

Monday, March 17, 2008

My beaded shamrock (from last year)


For this pattern as pdf click here.

Abbreviations:
beg. beginning
bp bead picot
ch chain
cl close
cm centimeter
CTM continuous thread method
ds double stitch
j join mm millimeter
p picot
R ring sb seed bead
sh shuttle
/ separates stitches on each side of split ring, or sets of rickrack tatting
ZZ zigzag, or rickrack tatting of victorian set stitches (first half of ds repeated a number of times, followed by second half repeated a number of times, completing one set)

Supplies:
Size 20 crochet cotton
12 size 8 seed beads
1 size 8mm round bead
42 size 11 seed beads
2 tatting shuttles

String the 42 size 11 seed beads and 3 of the size 8 seed beads onto the crochet cotton. Wind 2 shuttles CTM with the 42 beads on sh 2 and the 3 larger seed beads on sh 1.

Note: All joins in this pattern are shuttle joins made with sh 1. The large picots must be able to hold 3 size 8 seed beads when closed.

Begin with an open end ch.
Ch 7. R using sh 2 of 10, large p (about 18mm open), 10, cl.
Ch 7. J large 8mm bead by slipping it onto the open end of chain, pull sh 1 through the open end and cl.
R with sh 2 of 10, large p , 10, cl. Ch 7. R with sh 2 of 10, large p, 10, cl. Ch 7. J to beginning.
Ch 9, j to base of r.
*Ch (3, bp) 7 times, ch 3. J to large p, placing 3 size 8 seed beads on the p before j.
Ch (3, bp) 7 times, ch 3. J to base of same r. Ch 9. Rep. from * for a total of 3 “leaves”. J to beg.
(Stem) ZZ ch 2 sets of 4/4. R 7, p, bp of 3 size 8 seed beads, p, 7, cl. ZZ ch 2 sets of 4/4. J to beg.

My handwoven tapestry bags - 3 finished!

These are all handwoven on a loom, using traditional tapestry weaving techniques with my original ideas. Mostly wool yarns are used, some handspun.

Each has a tatted loop (yes, another use for tatting!) and one of my handmade polymer clay buttons.


They're lined with a cotton blend cloth, and measure about 5x6 inches. Just large enough for a small digital camera, or maybe a couple of tatting shuttles. Not enough room for a ball of thread, but still, each is a unique little bag that is one of a kind, and definitely a work of art.


Friday, March 14, 2008

Getting down to the "Knitty Gritty"

This batch with the browns, rust orange, and dull greens I decided to call "Knitty Gritty". It's not so "pretty" as some of my other colors.
The bright rust orange I decided to call "Spicy Hot". It's definitely not for those who like their colors to be mild on the taste meter!
And here is my 2nd attempt at "Nectarine". I think this one is better than my 1st attempt from last summer.

The colors are not currently in all the sizes; I was just doing some experimenting.

Wednesday, March 12, 2008

A dyeing art


People have been raving so much about my hand dyed thread, that I've decided to show some of the process I use here. I've linked many of the key words to Paula Burch's excellent dyeing website, so just click to get more information.

I learned what I do in a workshop class from an expert dyer, Nancy Simonson.

What I use is Procion MX dye. which is a fiber reactive dye. You can read more about using these kinds of dye on Paula Burch's page.


First I skein the thread using a skein winder, and then each skein has to be tied individually to keep it organized. This is the most time consuming part of the process. When the skeins are prepared, I can begin dyeing.


Rubber gloves are worn when working with the dye and the chemical solutions. All equipment used for dyeing must be kept ONLY for dyeing - NEVER used for food preparation! Children should not assist with dyeing until they are old enough to understand the precautions.
I begin by soaking the prepared skeins in a soda ash solution. This is to raise the pH to the alkaline side, necessary when dyeing cotton.


A dust mask is worn when mixing the dye powder into urea water. It is important to protect yourself from breathing in the dye powder! Once the dye is in liquid form, the dust mask can be removed. I then thicken the dye a little with print paste.


The prepared skeins are laid out on plastic wrap and hand painted with the prepared dye, then rolled up into the plastic. I put these rolls into a plastic wash pan that I use only for dyeing purposes.

The instructions that come with the dye say to let it cure for at least 4 hours for pastel shades, and up to 24 hours for darker shades.

The temperature for fiber reactive dyes to work must be above 70 degrees F (or 21 degrees C). Since my house is not very warm in winter, my solution is to put the wrapped skeins into my gas oven that has a pilot light.


Then the dyed thread is ready to be rinsed!


I use cold water for the first rinse, to help prevent the excess dye from muddying up the colors on the skeins. Then I rinse several times in warm water, then wash in HOT water and synthrapol, a detergent with a neutral pH, good at removing excess dye. Synthrapol is available where dye supplies are sold. I rinse again and repeat until the water is clear.


Then the skeins are hung up to dry, before being twisted into attractive skeins to show.


If I have done an extra-long skein, (for slow color changes) I rewind into a smaller skein.


Saturday, March 8, 2008

Lighthouse Lacer's Meeting

It's very fun to visit with the Lighthouse Lacers, a group of folks interested in all types of lace.

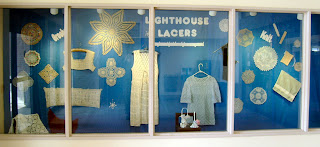
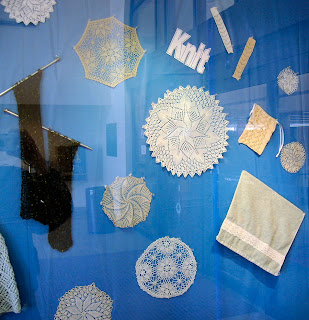
They currently have a window display focusing on knit and crocheted lace at the Northside Library in Kenosha, Wisconsin. Here are some photos I took of the display.


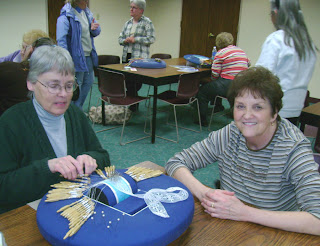
People worked on their lace at the meeting. I noticed examples of bobbin lace, Battenburg lace, crochet, knitting, needle tatting, and shuttle tatting. Several new people came in to see what we were doing.
Of course, I took along the Belle Armoire issue that my necklace is in, to show off to everyone there!

Friday, March 7, 2008

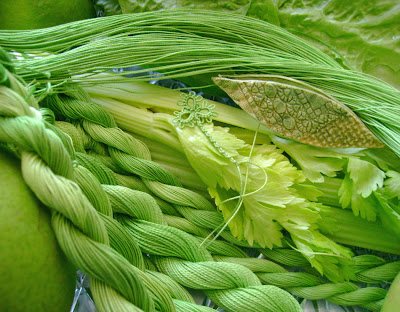
Hand dyed thread "Celery"

This new dye batch is posed with the makings of a good salad -
-and the tatting shuttle is handmade by Lady Shuttle Maker. The tatted clover has a tail started in an s-chain. This technique is explained very well by Sabina Carden-Madden.
So, it will be salad for supper tonight - followed by tatting - sounds very healthy to me!

Tuesday, March 4, 2008

Tricky earrings to go with "Vision" necklace, part 1

Been receiving requests for the pattern to the earrings that appear in one of the photos on my "Vision" necklace pattern.


Ok, the first tricky part:

Those were done a while back, the original pair is sold, and I didn't keep any notes! Yes, I do know that the design should have been written down, or a scribbled drawing with stitch counts made. I try to do that now with current ideas that seem sort of good. Anyway, starting with the stitch counts from the photo, I have been working out the pattern.

2nd tricky part:

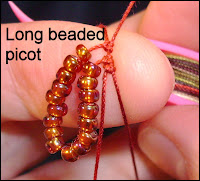
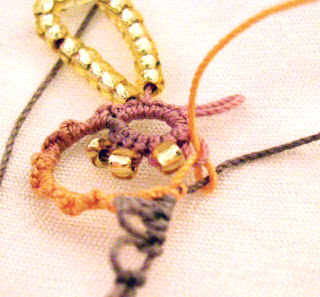
There is a join on the 2nd half of a split ring, the side where the double stitches are not flipped. So the join needs to be made in such a way that the core thread is still able to slide. The join is started like a normal join, but then "popped through" so that the core thread remains smooth, and able to slide. The top photo is an attempt to show this.
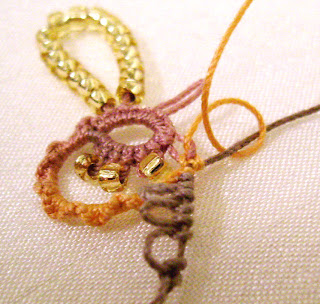
The 2nd photo shows the second half of the join. From what I've read, apparently not all tatters "complete" their joins, but that is how I do mine.

3rd tricky part:

The unflipped stitches on the 2nd half of a split ring are generally worked in reverse order - that is, 2nd half first, followed by 1st half. So to complete the join, it is good to remain consistent - remember what half you should be on!

The 3rd photo shows the completed join followed by the next picot, still open.

The bottom photo shows the split ring closed. Whew! And the earring is not done yet!


Next installment on this project is still to come.