Friday, June 26, 2009

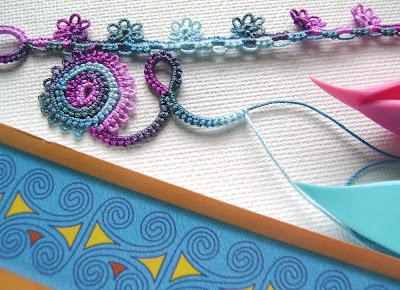
"Beguile" bracelet with spiral in hand dyed thread

I discovered that a bead could be in the center of a spiral shape. I started out sort of like a mock ring with bead in center. Then I continued a chain around in a spiral shape - I think the shape might properly be called an "Onion Ring" or "Catherine Wheel", but, busy as I've been, I haven't taken the time to research it.

I did use Catherine Wheel joins to very small picots, to keep the lines of the spiral shape smooth. Debbie Arnold of DS9Designs has prepared excellent directions for how to do the Catherine Wheel join - scroll down to the bottom of her page to find the link to her well-illustrated pdf file. I think there are more instructions for this technique prepared by other tatters, this just happens to be one link I had handy.
Something that confused me when I was learning this join was, "Which thread do I pull first?!" It's the thread that's coming from the chain! Pull till it "pops" through. Then a "hump" appears. Next pull the "hump"! That's when the first half of a double stitch appears, and then the rest is easy.
Anyway, I am thrilled with the effect given by the multicolored HDT in the spiral shape!

I finished the bracelet with tatted rings and chains in a coordinating solid, strung with pink beads to pick up the pink in the multicolored thread. By the way, I am currently working on dyeing more of this colorway I call "Vibrato", along with some of the solid blue as well.

Monday, June 22, 2009

"Midnight Oil"


While my family and I were visiting the Olbrich Botanical Gardens, my husband noticed this flower and remarked, "Hey, that looks like that thread you just dyed!" I agreed, until I got home and saw that my "Midnight Oil" thread is really very much darker!

There are so many unusual colors and designs in plants! Being in a beautiful garden is so calming and peaceful, it seems to me. And, more ideas for HDT :-)

Wednesday, June 17, 2009

Bracelet ideas and experimenting with spirals

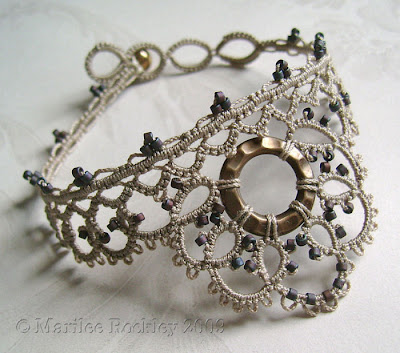
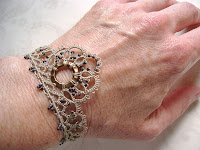
Here are a few of my latest "experiments" with bracelet design. The design in the dark ecru I call "Beguile", and it seems to work okay as a bracelet. Or - is it an upside-down tiara?

I started with a strip of pearl tatting (size 20, Lizbeth cotton) and then embellished it. There are some split rings at the end, to make the bracelet adjustable. The tatted loop just fits over the bead. I'm hoping the bead at the end will hold it securely enough. Since this style needs to fit snugly, I'd rather not use anything that might poke the wearer.
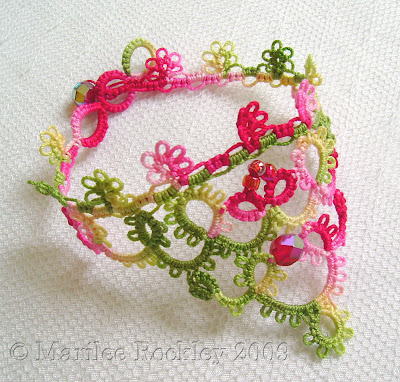
The brightly colored bracelet is a similar design, "Bedeck", done in my own hand dyed thread, size 10 "Rhubarb Pie".

New books! They're not tatting books, but when I saw them, I thought I might get some ideas for tatting designs from them.

So, being all excited about spirals, I managed to tat one, climbed out of it with a chain, ring, chain - then I want to do another spiral. Problem! It looks like I will have to cut the thread to start another spiral from the center, then somehow work in the ends. Probably I should tat all the spirals as individual motifs, then add chains as a 2nd round. Or is there a better way? I sure hope so, LOL.
Anyway, the spirals have to wait. I need to get back to work at my dye batch, which this week is "Midnight Oil".

Saturday, June 13, 2009

L.A.C.E. Day - shopping, visiting, displays and learning

Having fun! Here are some of us attending the Lace Day that was organized by the Lacemakers And Collectors Exchange. From left to right is Lace-lovin'Librarian Diane, me, Barbara, Gina, and Linda.
Bobbin lace in progress.
Some of the tempting threads and equipment for sale.
Vendors included LacySusan, Kenn Van Dieren, and The Lacemaker USA.
So many choices!
Beautiful lace art done by the members of L.A.C.E.
The Lace Day offered classes in bobbin lace, kumihimo, crochet, and beginning tatting.

I didn't sign up for any classes myself, just did some shopping and then sat down to tat in the demonstration area. Several people showed interest in what I was doing - which at the time wasn't "normal" tatting, but happened to be a "pearl tatting" project. So more questions followed! I did demonstrate the basic "flip" of shuttle tatting to several people, and assisted one extremely interested lady in choosing a good beginning tatting book from the vendors.

Tuesday, June 9, 2009

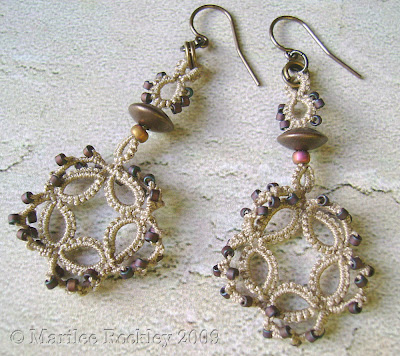
"Cogswell" tatted earrings

These started with split rings joined into a circle. The center lies flat okay, but I'm thinking it might be good to have 1 or so less double stitch on the inside than on the outside. The outer round is zigzag tatting (Victorian sets) with a bead at each change. This resulted in a bumpy, 3-D effect that I thought resembled gears or "cogs", so I entitled the design "Cogswell".

The larger beads were strung by onwinding the shuttles to get the thread through the beads, then shuttles rewound (it was only a little thread, so really not all that much trouble). The thread used was Lizbeth in the color "linen medium".

I was happy to be able to use a couple of the antiqued brass beads I bought at the Bead and Button Show last weekend. At that show I was looking for, among other things, "steampunk" supplies, and did stumble upon a few brass filigrees, tiny keys, and brass beads, which I think will combine nicely with dark ecru thread to give the effect of "Old Victorian" - even though I plan on coming up with designs that the Victorians really wouldn't have tatted. Maybe it is "Alternative Victorian". Yes, I think that's it!

Just experimenting, here. No need to worry that I will lose my affinity for bright colors! I enjoy them all!

Thursday, June 4, 2009

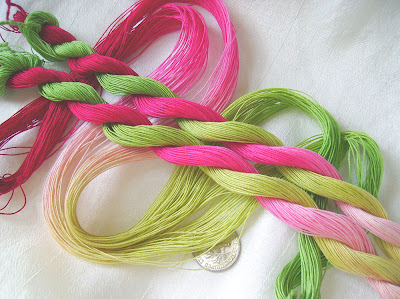
"Rhubarb Pie"

The latest hand dyed thread batch is now dry and added to my Etsy shop. I've had several people asking for these colors!

Sometime this weekend (June 6-7) I'll be heading over to the Bead & Button Show to do some shopping :-)

Then, next Saturday (June 13) I have plans to carpool with some members of the Lighthouse Lacers to Downers Grove, Illinois for the Lace Day festivities. Should be fun!

Wednesday, June 3, 2009

"R" we there yet?

Not quite, LOL.
This piece requires explaining, though I'm afraid an explanation won't really help much. It's a wedding necklace in progress that was supposed to incorporate some letter "R's" since both bride and groom have "R" in their initials. So I started with a fancy "R", then flipped it mirror image to have 2 "R's" facing, then - to my surprise, suddenly a cross appeared in the middle. Now, I actually think this design is turning out to be pretty fabulous (well, I would think that, LOL) but I'm not sure how the intended wearer will react to it. I've never even met the bride - she's the daughter of a friend of a friend who found out that I tatted and before I knew what was happening I got commissioned to tat a wedding necklace with letter "R's" in it. Sigh...live and learn...just say no!